SmartPBX Dashboard #
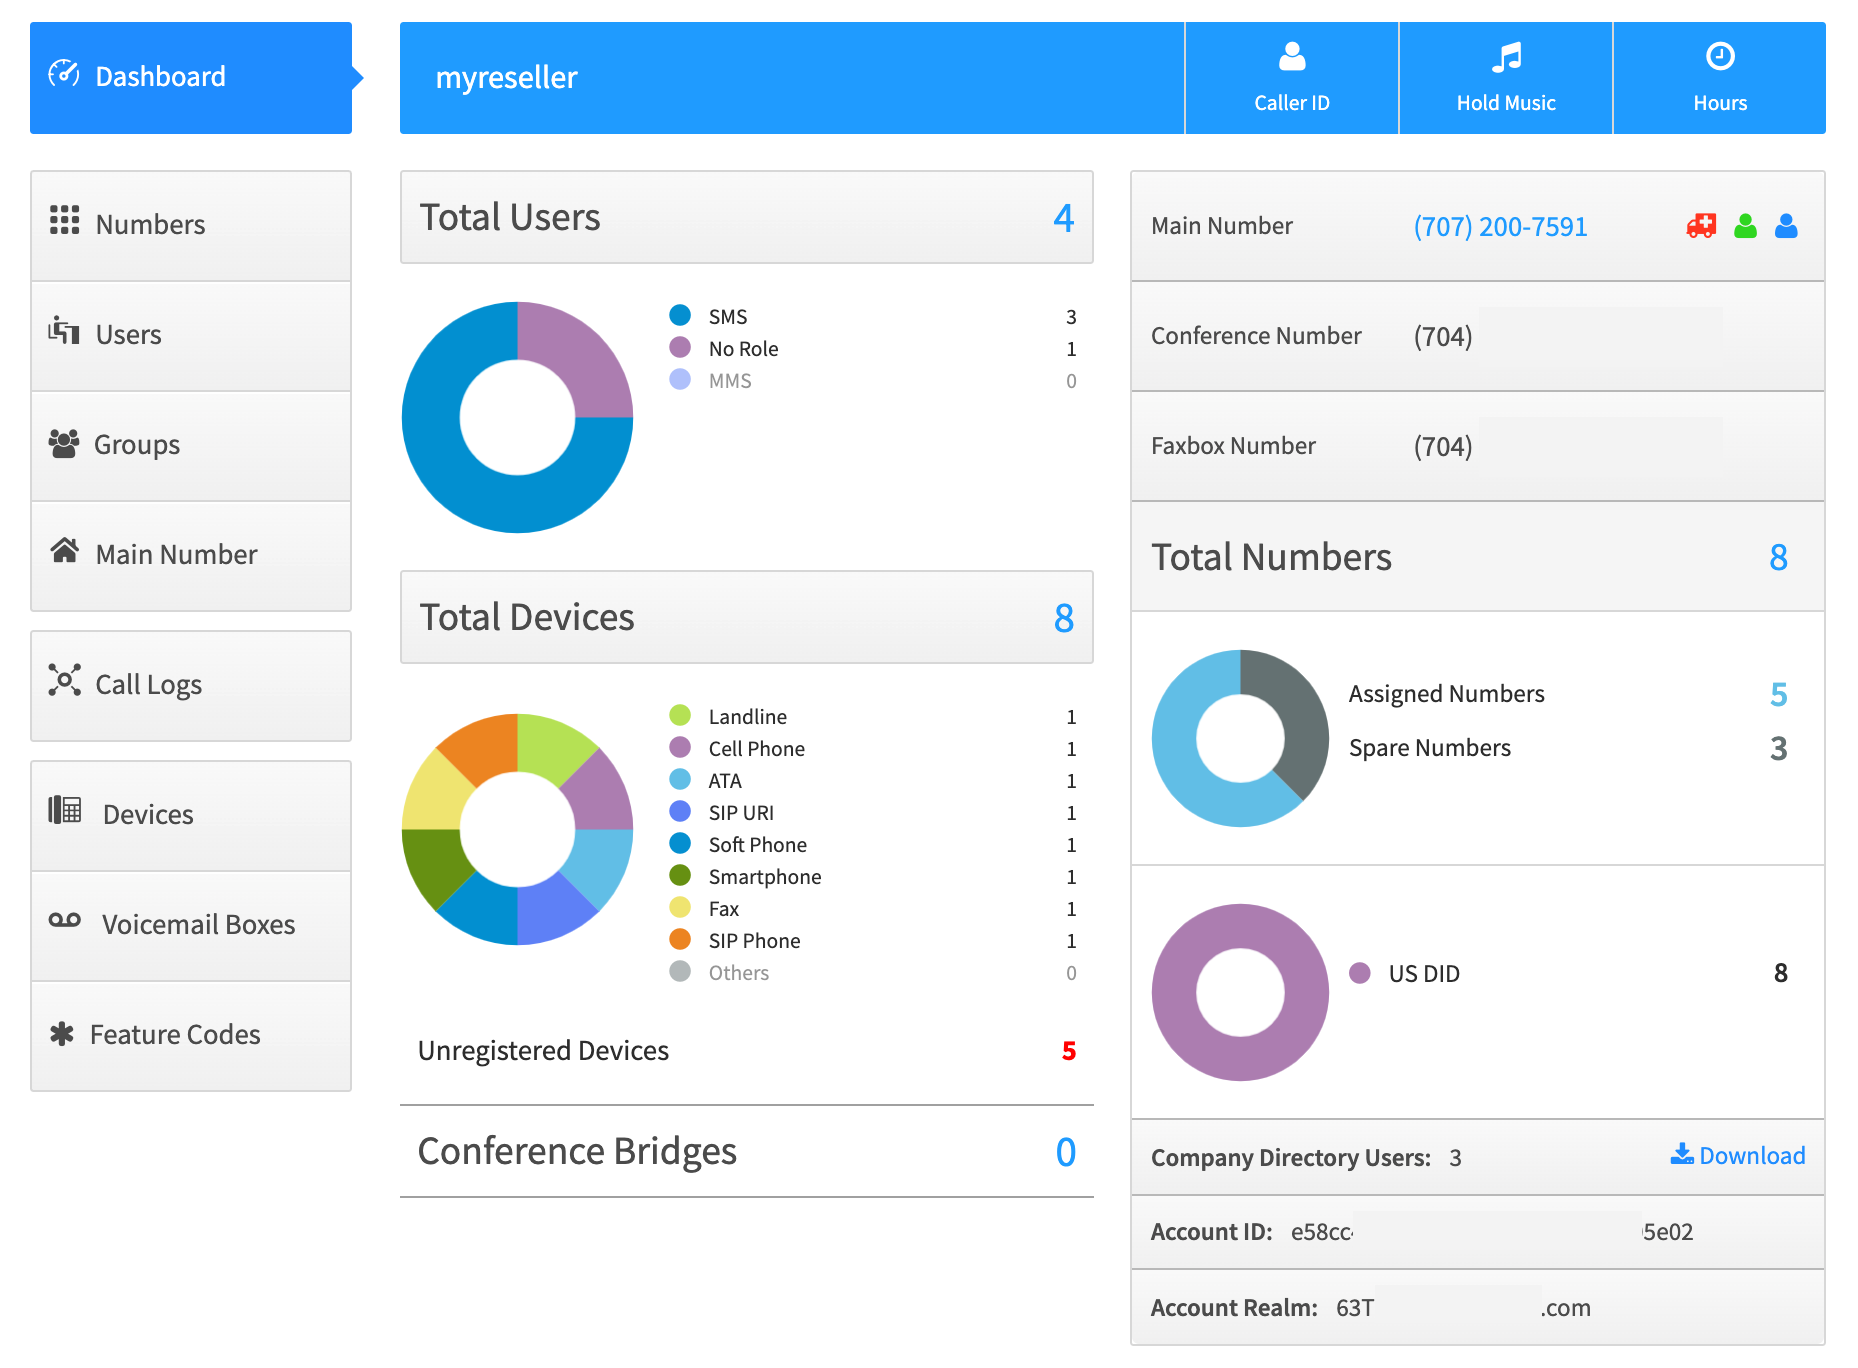
Below is an overview of what the SmartPBX dashboard is showing about your account configuration.
Dashboard #
Header Information #
This information provides quick access to some of the main features of your account.

The top left displays the account name you are viewing and is read-only. The tabs to the right are clickable and provide access to the following settings:
Account Default Caller ID Number #
Here you can set what number is used as the default Caller ID for outbound calls from the account. You can also set the CNAM and E911 info associated with the number. For more info on CNAM and E911 see the Main Number section below.
EMERGENCY SERVICE CALLS VERY IMPORTANT #
Calls to the emergency services will not be allowed if one of the DIDs belonging to the account is not configured with proper E911 address information. If the account has multiple physical locations, each location must have its own DID with E911 address information specific to that location. Devices that are not at the location matching the E911 address of the account’s default E911 configured number must specify the correct DID to be used for emergency calls placed from that device so that the 911 call can be handled by the correct 911 call center and so they can if needed send emergency responders to the correct address. If a call to 911 is placed and it is determined that the address is not configured or incorrect there are significant penalty fees charged.
If you bring your own carrier (BYOC) then E911 is not managed through ~.pbx.kazoo.name.~’s Monster UI and no check can be made to ensure you have E911 address information properly configured for the emergency Caller ID that you have configured.
Account Default Hold Music (MOH) #
Set what the account’s default hold music is. It will play when someone is on hold, in a conference room when there is only one person there, if you get Call Center the hold music there.
note
This can be over-ruled by add-on applications. For example, the Call Center Pro application provides added choices for uploading music and a sequence of "on hold" interactions, including "approximate waiting time" and "number in queue ahead of you".
Hours #
This allows you to revise the office hours you previously set up.
Total Users #
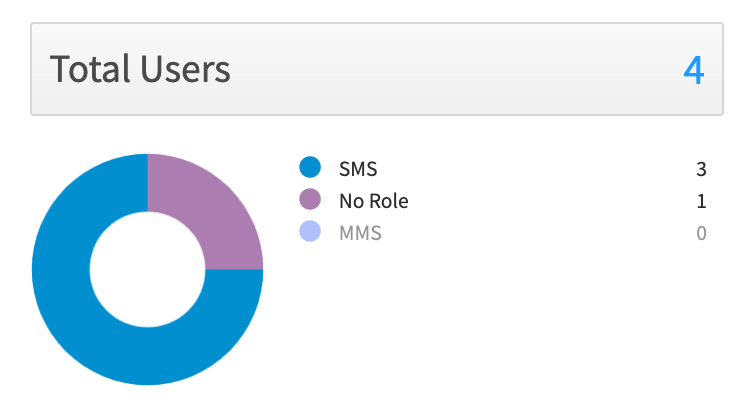
The total users graph shows the total number of users assigned to this account, and how many, if any have been given access to SMS/MMS messaging. There is an added charge for this so it is helpful to see what the summary here.
Total Devices #
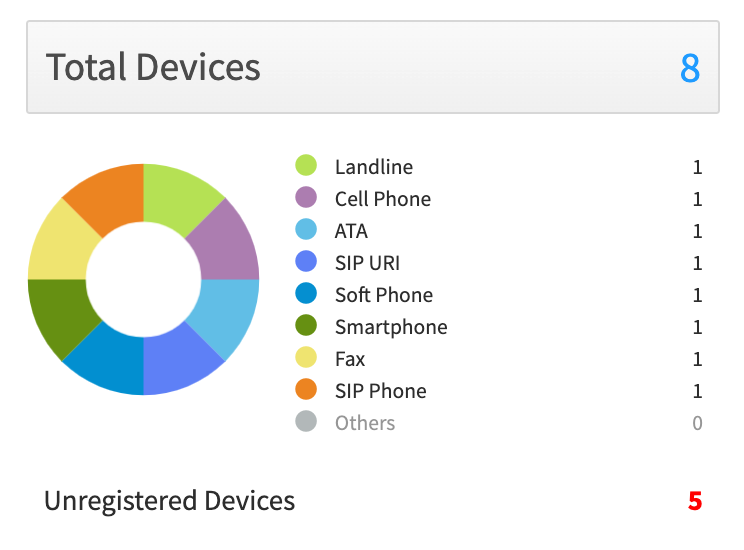
This summarizes the number of devices (not users, remember many users will have more than 1 device) configured for the account.
A desk phone is one type of device that is called a “SIP Phone” device type. Not all devices are necessarily themselves a “Phone”. Some can be a static forward to a phone number off net like a Cell Phone or might be an ATA that an old analog phone is connected to.
A circle graph representing the percentages of types of devices with a legend showing the actual count of each device type.
Unregistered Devices #
The total number of device that are not currently registered. It will include SIP phones/devices that are not registered and will include device types that by nature do not register like Landline, cell phones, and RTC webphones used in the comm.io app.
Conference Bridge Count #
Summarizes the total number of conference bridges set up for this account.
Main Number #

This displays the main numbers and the features active for each number. If you bring your own carrier E911 and Caller ID Name will not be available for you to manage with ~.pbx.kazoo.name.~.
When you first set up the account there will be a special message here to assign a Main Number.
Once you have one assigned, there will be a message to configure E911 for a Main Number.
See the Numbers section below for the meaning of the icons like image.png that may appear with a number.
Conference Number #
The account’s conference number if assigned.
One of the available user features is to have their own conference room, and/or a video conference room as part of the comm.io app. The user would give out the main conference number and the user’s conference room number along with an optional PIN access code.
Main Faxbox Number #
The account’s Main Faxbox number if assigned. This faxbox only handles inbound faxes and will send inbound faxes to the email address configured when a number is assigned to the Main Faxbox.
Total Numbers #
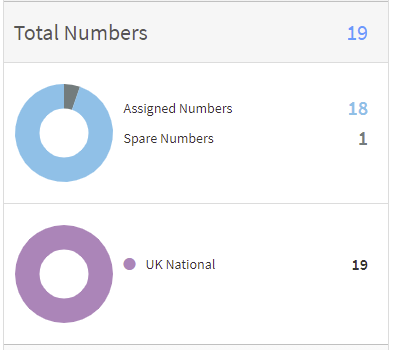
Summarizes the total Numbers owned by the account and indicates any and spare numbers you may have purchased in a group but not yet assigned. It also identifies 800 numbers you manage.
A Graph showing the classification of the Numbers owned by the account. The available classification names can be seen in the Restrictions portion of a device. US DID includes United States and Canadian numbers.
Company Directory #
Shows how many users there are in the company directory. You can configure a user not to be listed in the company directory. But by default, users will be added to the company directory. You can download this information as a .csv file also, and import it into a document for distribution.
Account ID #
This number will be used if you need a support person to help track down call routing issues or any other support questions.
Account Realm #
The realm of the account. This is used as part of SIP authentication and for faxboxes so the account users can send an email to the system that will then be sent as a fax to the destination number. See the Creating Accounts and Branding articles in the Getting Started resources for more info on the significance of the realm and the implications of changing it later.